When I thought "paint", I immediately thought of the Inspired By line, featuring more realistic and beautiful stamps that wouldn't require much coloring.
My first card uses Inspired By Spring. First, let me show you the finished product. I'll go in to the details as I show you the "how to" photos.
First up, I stamped the bird's nest with Brilliance Graphite Black ink and clear embossed. Here is a little tip when you are embossing - heat the BOTTOM of your paper, NOT the top where the image is. This is especially helpful with fine lines or large areas and keeps your embossing powder smooth, and prevents it from melting in to the paper. That is what I did for this image.
Next, I used my paint dabber to "sponge" the edges of the card stock. I also used a flourish stamp from Own Your Story to stamp some decorative detail in the corners of the panel. I used the paint for ink by dabbing it on the stamp and then stamping.
I used Smooch paint in a pearly white color to color in the eggs in the nest.
I used green Smooch paint to color the leaves.
I whipped out another type of paint, Crackle Paint, to use on the background layer. I spread it generously on the paper and then set it aside for quite a while to dry.
Here is what it looks like after it dries.
Here is the finished product one last time. Elegant with a touch of grunge! I finished it off with some gingham ribbon and a sentiment from the set stamped on one of the pieces from the First Place Award Ribbon Die-namics die.
While I had out all the materials, I decided to make one more paint card. After all, I needed something to do while my crackle paint was drying. LOL For this one, I decided to try a different type of technique and used a different Inspired By stamp set, Caged Bird. Again, I will show you the finished product first and then go in to the details below.
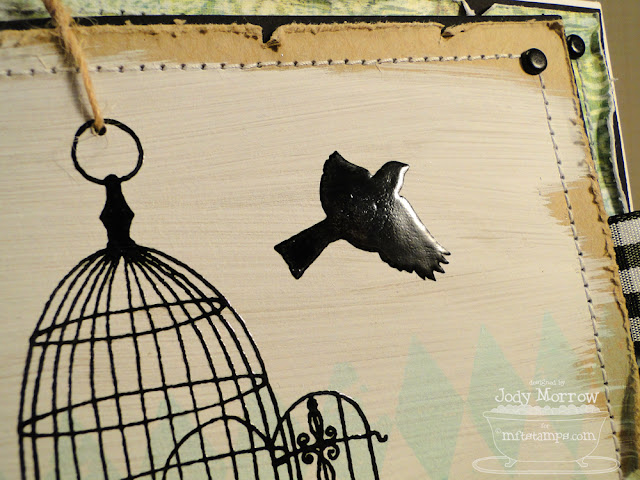
See the smooth finish of the embossed bird? That is achieved by heat embossing from the bottom of the paper instead of directly on the image.
I just love the Mini Film Strip Die-namics die. I backed it with some patterned paper to make it stand out against the back layer patterned paper.
I used a sponge to swipe paint from my paint dabber, which I poured directly on the kraft card stock.
I sped up the drying process by using my heat gun and then stamped the diamond pattern over the paint using chalk ink.
I stamped the bird cage with Brilliance Graphite Black and then clear embossed, being sure to heat from the bottom of the card stock, instead of the top.
I distressed the edges of the card stock with my Tonic paper distresser, and added some twine to hang the bird cage from. I kept it pretty simple to keep the focus on the paint.
If you've stayed with me all this time, thank you, and I hope you enjoyed my step-by-step pictures.
Want to know more about the MFT Designer Creative Challenge?
In 2011, MFT is working harder than ever to inspire you, and we have come up with something we think you'll really enjoy. Our Design Team Creative Challenge is a new monthly feature, where we challenge our design team to explore their creative side using a specific theme, product or technique. This month, we've all been challenged to paint! Visit Kim's Blog for a full list of designers that have taken the challenge!
Thanks for stopping by and I'll see you soon. I've been busy stamping and have lots to share with you.


The paint you added to your cards, adds so much to them! I also like the filmstrip border on the last card! Great cards! :)
ReplyDeleteLove the look of your cards! I need to go buy some Smooch!
ReplyDeleteThanks for the tips! and what a great cards!!
ReplyDeleteKind regards Cornelie
wow you rocked this challenge Jody
ReplyDeleteAbsolutely beautiful!! I love your
ReplyDeletestep by step instructions & I
learned some things! I think I'll
try this - Thanks so much!
These are beautiful!!! I love the parts you coloured with Smooch!!
ReplyDeleteSo cool! I LOVE your cards! And the heat on the underside of the embossed image is a brilliant idea! Definitely trying that the next time I emboss!
ReplyDeleteThese are STUNNING!! You, Mel, and Christina are going to make me go to the store to try that crackle paint. Total gorgeousness. These are perfect Jody cards kicked up a notch!!
ReplyDeleteFab tutorials. I am an avid user of Twinkling H20's and Smooch paints. Haven't used crackle or big swipes of paint...... yet! Fantastic cards!
ReplyDeletebeautiful craetions Jody. loove that crackle paint and that smooch is way cool!
ReplyDeleteJody, I love these cards. This technique seems to be out of your usual style and I'm loving it. I will definitely be trying these these techniques and especially the tip for embossing from the bottom side. Makes sense. Thanks so much for your great work.
ReplyDeleteOooooh, la, la! I love the painting technique...coordinates nicely with your birds nest image...very natural!
ReplyDeleteLOVE them BOTH Jody!
ReplyDeleteThese are out of this world Jody! LOVE LOVE LOVE!
ReplyDeleteWow Jody!!! I seriously ADORE both of these cards! Wow!
ReplyDeleteWOW, WOW, WOW!! You ROCK Jody!
ReplyDelete